 Before and After
I wonder how many lawn cushions just like these get thrown away all the time? My husband found a great deal on a couple of wrought iron table and chairs last fall. They came with these cushions that have see better days. I power washed them twice and let them dry in the sun. Since Spring is fast approaching I needed to get them covered ASAP!.
Calculate How Much Material
I measured them and calculated how much material I needed. I determined that each cushion would need 39 inches of length. (measure how long the cushion is and multiply by 6 (39x6=234inches then divide by 36 to figure how many yards 234/36=6.5)I visited my local Joann's Fabric and Crafts Store and picked up an outdoor stripped yellow, grey and black fabric (my husband's favorite colors) and some Velcro. I used my 40% coupon, so I'm able to recover 6 chairs for only $11 each.
Supply List:
- 6.5 Yards of Outdoor Material
- Thread
- Scissors
- Pins
- Velcro
- Sewing Machine
- Straight Edge (if you can't sew or cut a straight line like me)
- Basic basic sewing knowledge
Cut Material to Legnth
Lay material out flat exactly how it comes off the bolt (folded in half) and measure out 6 - 39 inch pieces and cut
Determine Side Seams
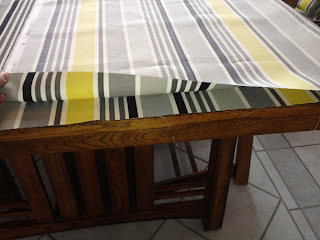
Align Pattern
Pin Right Sides Together and Align Stripes
Draw Seam Line on Top
Since I can't cut a straight line I line up a straight edge on one of the stripes and draw it in with a pencil.
Take it to the Machine
Sew up only three sides and reinforce the corners by double stitching
Use pencil line to sew straight line on the top
Test the fit and make adjustments if needed
If it fits - Trim off both sides
(If it doesn't then turn it back around and sew it up tighter)
Trun it right side out and top stitch all three sides
Make Staps
Use the folded side to make the Velcro straps
that will hold the cushions to the chairs.
Take the folded side that you just trimmed off back to the sewing machine
Sew up the folded side at appoximately 1.5 inch width
Trim off excess material
Cut four 8.5 inch sections
Turn each section right side out
Turn right side out
Tuck ends in
Cut Velcro in 1.5 inch strips (same width of straps)
Top stitch all straps and sew on velcro
Strap Placement on cover
Sew on Straps
Back stitch several times for added strength
Stitch only an inch on the side straps
Cover the cushion
Turn the edges under and sew
ENJOY!!
Source: carolsdistinctivecreations.blogspot.com via Carol on Pinterest


